> ## Documentation Index
> Fetch the complete documentation index at: https://docs.letterbucket.com/llms.txt
> Use this file to discover all available pages before exploring further.
# Add Subscribers
> Learn how to add subscribers and manage them
This screen is the **Subscribers** section, where you manage your audience inside LetterBucket. You can add subscribers manually or import them in a CSV file.
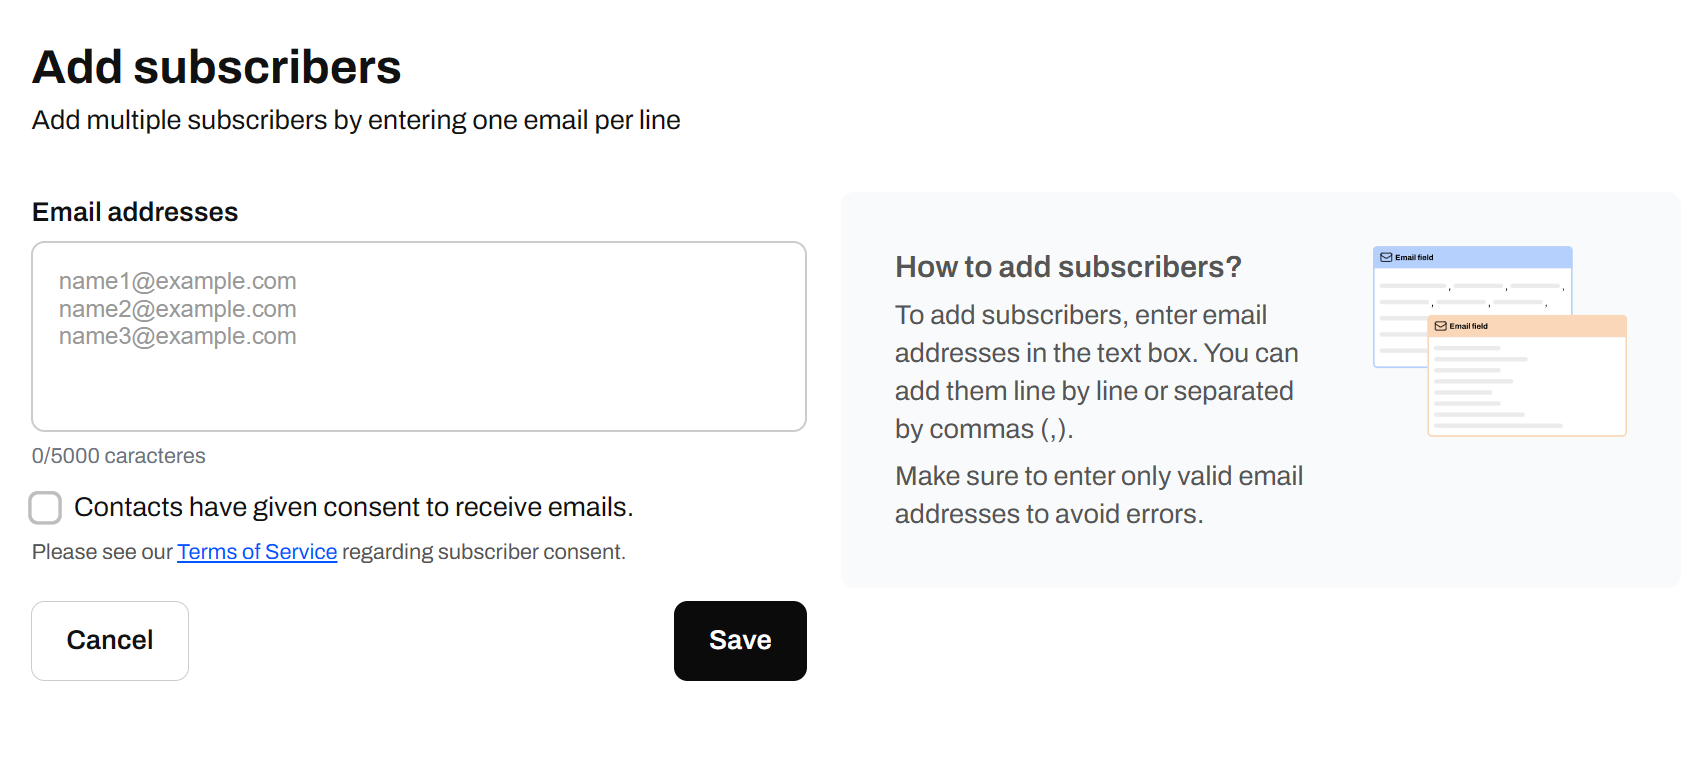
##  ## 1. Add subscribers manually
You can directly paste or type multiple email addresses here — one **per line**. Example:
[name1@email.com](mailto:name1@email.com),
[name2@email.com](mailto:name2@email.com),
[name3@email.com](mailto:name3@email.com),
[name4@email.com](mailto:name4@email.com)
* **Consent Checkbox**\
You must confirm that your contacts have **given consent** to receive emails from you. This is required for compliance with laws like GDPR and CAN-SPAM. If you check this box, they will be added directly to your list. If you don't check it, they will receive an email asking them to confirm the subscription to your newsletter.
* **Save Button**\
Once you're ready, click **Save** to add the subscribers to your list.
Only include **valid, opted-in email addresses** to avoid issues or bouncebacks.
##
## 1. Add subscribers manually
You can directly paste or type multiple email addresses here — one **per line**. Example:
[name1@email.com](mailto:name1@email.com),
[name2@email.com](mailto:name2@email.com),
[name3@email.com](mailto:name3@email.com),
[name4@email.com](mailto:name4@email.com)
* **Consent Checkbox**\
You must confirm that your contacts have **given consent** to receive emails from you. This is required for compliance with laws like GDPR and CAN-SPAM. If you check this box, they will be added directly to your list. If you don't check it, they will receive an email asking them to confirm the subscription to your newsletter.
* **Save Button**\
Once you're ready, click **Save** to add the subscribers to your list.
Only include **valid, opted-in email addresses** to avoid issues or bouncebacks.
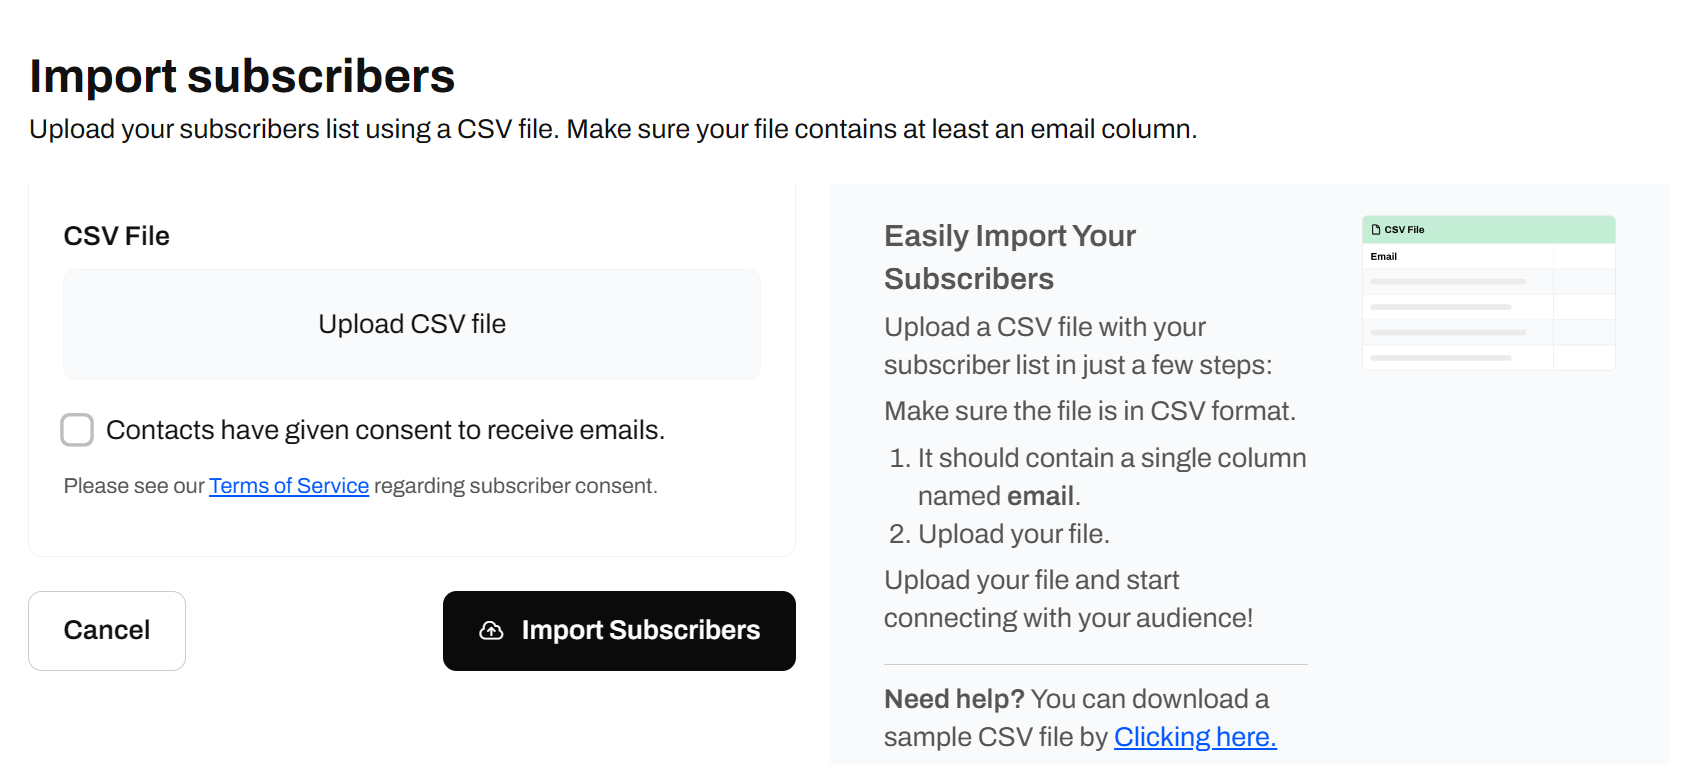
##  ## 2. Upload a CSV file
Click **“Upload CSV file”** to select your file. It should include at least one column with valid email addresses. You can also include other columns like names, tags, or custom fields.
* **Consent Checkbox**\
You must confirm that everyone in the CSV has **given consent** to receive your emails. This keeps you compliant with data and privacy laws like GDPR.
* **Import Subscribers Button**\
Once your file is uploaded and you've checked the consent box, hit **”Import Subscribers”** to upload the list.
## 2. Upload a CSV file
Click **“Upload CSV file”** to select your file. It should include at least one column with valid email addresses. You can also include other columns like names, tags, or custom fields.
* **Consent Checkbox**\
You must confirm that everyone in the CSV has **given consent** to receive your emails. This keeps you compliant with data and privacy laws like GDPR.
* **Import Subscribers Button**\
Once your file is uploaded and you've checked the consent box, hit **”Import Subscribers”** to upload the list.
 ## What's next?
Once your subscribers are in, you can:
* [Create segments](/subscribers/segments) to group them and send targeted emails.
* [Set up a welcome email](/subscribers/welcome-email) to automatically greet every new subscriber.
* [Create a subscription form](/subscribers/subscription-forms) to embed on your website and grow your list.
## What's next?
Once your subscribers are in, you can:
* [Create segments](/subscribers/segments) to group them and send targeted emails.
* [Set up a welcome email](/subscribers/welcome-email) to automatically greet every new subscriber.
* [Create a subscription form](/subscribers/subscription-forms) to embed on your website and grow your list.