

In LetterBucket, once you send an email, it becomes a Post. Why? Because it’s not just sent to your audience’s inboxes, it’s also published on your website automatically.Documentation Index
Fetch the complete documentation index at: https://docs.letterbucket.com/llms.txt
Use this file to discover all available pages before exploring further.
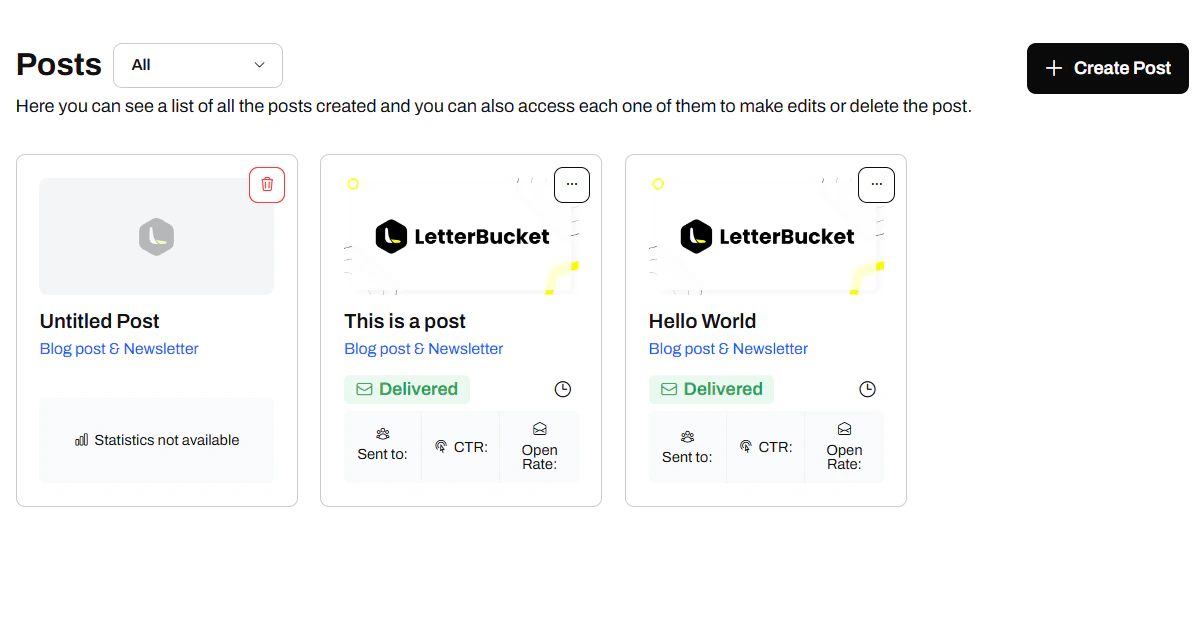
Post Filter (Dropdown)
Lets you filter posts by status. Super helpful when you’ve got a long list and want to find something quickly. Available filters:| Filter | What it shows |
|---|---|
| All | Every post regardless of status |
| Draft | Posts not yet sent or published |
| Scheduled | Posts queued to send at a future date |
| Delivered | Posts that have been sent to subscribers |
| Published | Delivered posts that are visible on your public website |
Post Cards
Each card represents one post and gives you quick access to its status, stats, and actions:1. Draft Post
- Label: Labeled as “Draft”, this post hasn’t been sent or published yet.
- Stats: Not available yet, because it hasn’t been delivered.
- Trash Icon: Lets you delete the draft directly from here.
2. Delivered Post
- Label: Labeled as “Delivered”, this one has already been sent and published.
- Basic Stats:
- Sent to: Number of recipients.
- CTR: Click-through rate (how many clicked something inside the email).
- Open Rate: Percentage of people who opened the email.
- Analytics: Click on the post to open its full Analytics view, where you can see opens over time, link clicks, and poll results.
3. Scheduled Post
- Label: Labeled as “Scheduled”, this one is waiting until it reaches the programmed time. You can see this by hovering the clock icon and edit it to change the content or the date of sending. To do so, click on the 3 dots on the upper right side of the card.